Web App User's Manual
Create A User Account
Register a new account
https://cogswell.io/#!/register
To create a new user account in Cogswell is a simple process. Navigate to https://cogswell.io/#!/register and enter your user information in the required fields.
- First Name - Minimum of 1 character
- Last Name - Minimum of 1 character
- Company Name - Minimum of 2 characters
- Job Title - Minimum of 2 characters
- Email - Must be a validate email address
- Password - Minimum of 8 characters
- Confirm Password - Minimum of 8 characters and must match the Password field
Note: all fields in Cogswell are case-sensitive
When all user information is entered, next answer the Captcha question and then click the 'Sign Up' button. An email is sent to the email address entered asking the user to confirm the registration, "A confirmation message has been sent to your email address. Please confirm your registration, then login here." Once the email is received the user is asked to activate the Cogswell account by clicking the link in the email. Once the link is clicked the Cogswell account is now activate and the user is returned to the Cogswell login page.
Login and Get Started
Fill in the 'Username' and 'Password' fields on this page. The 'Username' is the email address that was entered when creating an account. Enter the Password that was created when creating an account. Then click the 'Login' button.
When the user logs in for the first time the user is directed to the 'QuickStart' wizard to step through the process of setting up API keys, Project Attributes and a test Project.
Step 1: Generate an API Key
- To create a Key Pair the user will enter a name in the Name field to identify the API Keys based on the users schema, this field is alphanumeric.
- Then click the 'Create keys' button to generate a new set of Keys, an Access Key and a Secret Key. At the point the access key can be copied and used in an app or the user can finish the QuickStart process and retrieve the access key at a later time.
- Click the 'Next' button
Step 3: Create a Project
- A Project is a logical organization of data. A Project typically represents a product line. Product lines have devices that are produced or have other devices they interact with. No matter what API Keys the user uses, the data sent to Cogswell will be organized in the system according to the Project associated with that data.
- Enter a Project name in the field, use a name that will help organize data, this field is case-sensitive and accepts alphanumeric characters.
- A Project is required to use Cogswell.
- Click the 'Next' button
Step 4: Create Project Attributes and Primary Key
- Project Attributes are fields that are created to collect information for a specific Project.
- Enter a name for the Attribute, this field is will accept alphanumeric characters and is case-sensitive.
- Select the appropriate data type, Integer, Text, Float, Date or Boolean.
- Click the '+Add Attribute' button.
- Create as many Project Attributes as needed. New Project Attributes can be created at any time, click the 'Project Attributes' link in the menu to go to the Project Attributes page.
- Once all Project Attributes are created, select a Primary Key or Keys by clicking the checkbox associated with that Attribute.
- Primary Keys are used to unique identify a device, or person, or whatever the unique identifying aspect of your Project is. This could correspond to a unique identification number of a customer, a device, or a combination of both. Two examples: (1) a user's email address (2) a device's UDID. Primary Keys(s) can be a single attribute or a combination of attributes. The Primary Key(s) will describe how data is organized so careful consideration should be given when defining a Primary Key or Keys. The Primary Key Attribute(s) can be Project specific, or come from the list of Core Attributes (Note: Core Attributes are a legacy feature that is no longer supported). Once created, the Primary Key(s) for a Project cannot be changed.
- Primary keys in combination with the Project are used to define a topic. This means you could have as many topics as you do unique primary key values.
- Click the 'Next' button
Step 5: Finish and Test
- Click the 'I'm ready to go!' button to be directed to your account in the Cogswell site.
Getting Around in Cogswell
Getting around in Cogswell is pretty simple, here are some helpful hints.
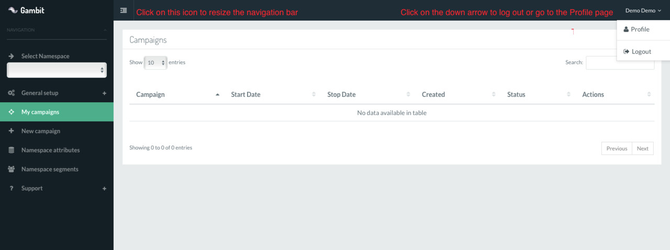
- Navigation bar
- The user can control the size and display of the navigation bar by clicking on the nav icon.
- In the upper right corner the user can Logout or view the Profile page
.
- The Profile page allows the user to update profile information, update the email address, change passwords, view and update plan information and view account history.
- Lists
- All lists utilize key word search functionality, API Keys, Projects, Attributes, Campaigns, etc.
- The user can control how many rows of a list to show, 10, 25, 50 or 100.
- 'Name' fields are sorted in alpha order and can be sorted A-Z or Z-A.
- 'Date' fields are sorted in chronological order and can be sorted by newest to oldest or oldest to newest.
- My Campaigns
- The user can choose to which columns to display by clicking on the settings icon in the top right corner.
- Campaign, Campaign ID, Start Date, Stop Date, Created, Status and Actions.
- The user can choose to which columns to display by clicking on the settings icon in the top right corner.
- Account
- View your Account information by clicking on your user name in the upper right corner, then click Account.
General Setup
API Keys
API Keys are the mechanism by which all communication with the Cogswell API is authenticated.
The Keys page displays a list of KeyPairs that the user has created. 'Name', 'Date Added', 'Total all-time transactions', 'Most recent use' fields are visible. KeyPairs can be deleted only if data has not been previously collected using the KeyPair. If there is data associated with the KeyPair, the KeyPair can not be deleted. The user can create a new KeyPair on the page as well. To create a KeyPair the user will enter a name in the Name field based on the user's schema. Then click the 'Create Keys' button to generate a new set of Keys. The user can create as many KeyPairs as necessary.
- API Key - Set of 2 Keys, KeyPair, that uniquely identifies your organization and associates any data sent to Cogswell to your account. The API Keys can be used for administrative tasks against the API, including generating new client keys. API Keys are required to use Cogswell.
- KeyPair - Unique set of identification strings that are used to authenticate events containing the associated Access Key, identify the user and Project events for billing.
• Access Key - This is the key that is embed in your client application.
• Secret Key - This is used to authenticate events containing the associated Access Key. The Secret Key component of your API Keys should remain completely secret and secure in your internal systems and should NEVER be deployed into any client apps.
Client Keys
Client Keys are derived from API Keys. The user can select which API Key will be associated with the Client Keys. It is these Client Keys, not the API Keys, which should be deployed in those apps/devices which use the Cogswell API and the Cogswell SDKs. Client Keys are limited to those actions to which clients should be limited: sending events, establishing push WebSockets, etc.
Client Keys are generated by the Cogswell API's GET /client_secret endpoint. Client Key generations are authenticated using API Keys only (not Client Keys). Client Keys are authenticated using the API Keys from which they are derived. For this reason, the Access Key component of the API Key from which a Client Key is derived must always be supplied as part of the payload in authenticated client endpoints. A Client Key consists of a Client Secret and a Client Salt. The Client Salt is a random sequence of bytes which is used in combination with the associated API Key's Secret Key to generate a Client Secret. The Client Secret is generated by performing an HMAC-SHA256 where the associated API Key's Secret Key is the key component of the HMAC operation and the Client Salt is the payload of the HMAC operation.
The Client Salt, Client Secret, and Access Key are the only values required in order to authenticate when calling a client endpoint. The Client Salt and Access Key must always be sent along as part of the payload, and the HMAC which signs the payload which must contain these values. The Access Key is used on the server side to lookup the associated Secret Key. The Secret Key is then used in combination with the Client Salt in order to re-create the Client Secret contained in the requesting client (the Client Secret which was used in order to generate the payload HMAC signature). The derived Client Secret is then used to generate an HMAC signature of the payload, and the resultant HMAC is compared with the supplied HMAC along with the request. If the two HMAC values match, the request is authenticated and will proceed.
This system allows greater control over how to authorize devices, systems, or applications to hit our APIs. This design means that if a Client Key is compromised and is being abused, the user can revoke access for certain Client Secret / Client Salt pairs without affecting other devices, apps, or systems. This means that the primary Secret Key can stay secure and can continue to be used. If we did not provide derived keys for clients, but instead only used the API Keys for everything, then the API Keys would have to be removed universally which would affect all devices, apps, or systems that used that API Key for Cogswell authentication.
Projects
Projects are used to organize data that is sent to and from Cogswell. A Project typically represents a product line. Product lines have devices that are produced or other devices they interact with. Everything in Cogswell operates at the Project level. The Project value will always be included in the data that is sent to and from Cogswell. Reporting, dashboard, segments, campaigns, etc. will be organized by Project.
The Project page displays a list of Projects if the user has previously created Projects. 'Name', 'Date Added', 'Total all-time transactions' and 'Most recent use' fields are displayed. The user can click on a particular Project to view the Project Attributes that are associated with that Project.
The user can create a new Project on this page as well. To create a new Project the user will enter a name of the Project based on the user's schema, the Project field is case-sensitive. Click the 'Next' button to go to the Project Attributes tab. The Project Attributes tab displays a list of Attributes associated with the Project. When creating a brand new Project the the list will initially consist of Core Attributes, if previously defined (Note: Core Attributes can no longer be created and are a legacy feature). The user can add Project Attributes specific to this Project by entering an Attribute Name, selecting the appropriate Data Type and clicking the '+Add Attribute' button.
Core Attributes (Legacy Feature)
Warning: Core Attributes are no longer supported. Existing core attributes function as normal, but creation has been disabled. If shared attributes are needed, simply add them to each individual project independently.
Fields that are created universally for all Projects that are associated with a unique API Key. Core Attributes are generally set up at the time the API Key is set up. The user can add to the Core Attributes list at any time and the newly created Core Attribute will be available for all active Projects associated with the API Key.
The Core Attribute page displays a list of Core Attributes if the user has previously defined attributes. Core Attribute 'Name', 'Data Type' and 'Date Added' fields are displayed. Core Attributes can be deleted only if data has not been previously collected. Core Attributes can only be deleted from the Core Attributes page. Core Attributes are not required.
Attributes are listed in alpha order.
- Attribute Name – Can consist of Alphanumeric characters and underscores (_), this field does not accept spaces
- Data Type – Values are Integer, Text, Float, Date, Boolean
Mobile Applications
Create a Mobile Application that defines the mobile environment and Cert file or Android API Key associated with the users Mobile App. Defining Mobile Applications is not required if a mobile app is not used.
The Mobile Applications page displays a list of Mobile Applications created by the user, if Mobile Applications have been previously defined. The 'Application ID', 'Platform', 'Environment' and 'Actions' are displayed on the Mobile Applications page. The user can also create Applications on this page.
To create a new Mobile Application the user enters a name in the Application ID field based on the user's Bundle ID that was previously created, the Application ID field is case-sensitive.
Select the Application Platform, iOS or Android.
Select the Application Environment, Production or Development. If the Application Platform is iOS the user must select Production as the Application Environment.
If the Application Platform selected is iOS, then user must upload a cert file and enter the cert password. For information on creating APNS certificates, see http://quickblox.com/developers/How_to_create_APNS_certificates
If the Application Platform selected is Android, then the user must enter the Android API Key that the user has previously created. For more information on creating Android App API Keys see https://developers.google.com/maps/documentation/android-api/start#step_1_download_android_studio
My Campaigns
The My Campaigns page displays a list of Campaigns that the user has created for a specific Project, which is visible in the upper left corner. Selecting a different Project from the Project drop down list will display the campaigns created for that Project.
The Campaign name, Start Date, End Date, Created Date and Campaign Status are displayed on the My Campaigns page. The available ‘Actions’ for each campaign are ‘Edit’, ‘View’ and ‘View Status History’. If the campaign is edited but unsaved, a cogs icon will be added to the left of the campaign name.
To Edit any or all parts of the Campaign the user can click the edit icon to view and edit all fields of the Campaign.
To quickly make changes to the Campaign Schedule the user can right click on the specific Campaign and view scheduling options based on the ‘Status’ of the Campaign.
- Campaigns with the status of ‘active’ can be modified with the following options:
- Stop Campaign – Immediately stops the Campaign, the ‘Stop Date’ is updated and the Status is updated to ‘stopped’
- Complete Campaign – Immediately completes the Campaign, the ‘Stop Date’ is updated and the Status is updated to ‘complete’
- Modify Schedule
- Stop and Change Dates – Immediately stops the Campaign and the user can update the Start and Stop Dates and Times of the Campaign, the status is updated to ‘stopped’.
- Keep Active and modify end date – The user can update the Campaign End Date and Time either extending the Campaign or reducing the Campaign Date/Time.
- Stop and unschedule – Immediately stops the Campaign, clears the Start and Stop Dates and the status is updated to ‘not-scheduled’
- Campaigns with the status of ‘stopped’ can be modified with the following options:
- Resume campaign – Immediately changes the status to ‘active’
- Complete campaign – Immediately stops the Campaign, updated the Stop Date and changes the status to ‘complete’
- Campaigns with the status of ‘not-scheduled’ can be modified with the following options:
- Modify Schedule
- Stop and Change Dates – Immediately stops the Campaign and the user can update the Start and Stop Dates and Times of the Campaign, the status is updated to ‘stopped’.
- Start Immediately – – Immediately starts the Campaign, updates the Start Date and the status is updated to ‘active’
- Complete Campaign – Immediately completes the Campaign, the ‘Stop Date’ is updated and the Status is updated to ‘complete’
- Modify Schedule
- Campaigns with the status of ‘complete’ can be modified with the following options:
- Schedule
- Stop and Change Dates – The user can update the Start and Stop Dates and Times of the Campaign, the status is updated to ‘active’.
- Start immediately – Immediately starts the Campaign, updates the Start Date and Time and the status is updated to ‘active’
- Schedule
The ‘View’ icon is only available for completed Campaigns. The user can view the Campaign criteria only. The user cannot make changes to a campaign that is complete.
Clicking on the ‘Show status changes’ icon will display a pop up window with all changes to the status with a date and time stamp of the status change.
New Campaigns
New Campaigns can be created on this page. The 4-step wizard take the user step by step through the process to create a Campaign.
Step 1: OVERVIEW
- Campaign Name – Enter the name of the Campaign, this field will accept all characters
- Start campaign date/time
Immediately - Selecting this option will make the Campaign active immediately
On a specific date - Use the calendar tool that appears to select a Start Date, click on the clock icon to select the Start Time
I’ll schedule later – The user can schedule or start the Campaign at a later time, choosing this option results in a ‘not-scheduled’ status on My Campaigns campaign list
Stop campaign date/time
No Stop Date - Selecting this option will allow the Campaign to continue running indefinitely, the Stop Date can be modified at any time.
On a specific date - Use the calendar tool that appears to select a Stop Date, click on the clock icon to select the Stop Time
- Delay - Choose Delay Campaign message transmission option if the user wants the message sent at a later time.
- If box is clicked, the user will select how long to delay the Campaign.
- Delay options are Minutes, Hours, Days or weeks.
Click Next button to move to the Content tab.
Step 2: CONTENT
Campaign message content can utilize many options from a URL pointing to web-based content, Push notification message text, json payload, iOS APNS or Android GCM. Some of these fields have the ability to inject attribute values that are stored in the database.
Injection into a field requires that you put an attribute name surrounded by double brackets and to be either prefixed with a "pub." or a "sub." Below is an example of what you may inject into a JSON attribute field:
Injection
Injection into a field requires that you put an attribute name surrounded by double brackets and to be either prefixed with a "pub." or a "sub." Below is an example of what you may inject into a JSON attribute field.
example:
{ {"message": "Congratulations {{sub.name}}! You are our {{pub.number}} customer!"} }- The above example assumes that we have attributes called "name" and "number".
- The first attribute will be injected with the most recent value for that attribute for the CIID which is receiving the message.
- The second attribute will be injected with the most recent value for that attribute for the person who triggered the campaign to send the message.
- The event that triggered the message does not have to contain the injected attribute.
- If the attribute does not exist in the double braces, then there will be no substitution and value will remain the same.
- If the attribute does exist in the Project definition but has no value defined for that specific attribute the substitution will occur and will replace the text and double brackets with the text "null".
- The only exception to this rule is if there is a string that has no value defined in the JSON payload then it will be replaced with the empty string.
- For the JSON body any strings injected that contain a double quote, the double quote will be escaped before it is inserted into the JSON
- The fields that can use attribute substitution:
- URL
- Notification Message
- JSON Payload
- iOS - sound
- iOS - category
- Android - message title
- Android - icon
- Android - tag
- Android - click action
Fields
URL
No URL - The user should select this option if the Campaign message content will not be a URL but will be one of the other options available on the page.
Specify a URL - The user should select this option if the content is a URL, a fill-in box will appear, enter the URL here. The URL fill-in box is required when this option is selected. The user will define how their client app will interpret the URL to take an action.
Notification Message - Enter the Campaign message text here. This text will appear as a push notification.
- Send Triggering Event - (On/Off switch) - Whichever event triggers this campaign will be forwarded into the message that is delivered the campaign's audience. The entire event dataset will be included in the campaign message.
JSON Payload - Enter Campaign message json payload string here. The user will define how their client app will interpret the JSON to take an action.
iOS Specific - APNS - The user should select this option to define Payload Keys. Refer to official APNS documentation here.
Content Available (On/Off switch) - Provide this key with a value of
1to indicate that new content is available. Including this key and value means that when your app is launched in the background or resumed,application:didReceiveRemoteNotification:fetchCompletionHandler:is called.If the notification is delivered when the app isn’t running in the foreground the system presents the notification, displaying an alert, badging an icon, perhaps playing a sound, and perhaps displaying one or more action buttons for the user to tap.
Badge - The number to display as the badge of the app icon. If this property is absent, the badge is not changed. To remove the badge, set the value of this property to
0.Sound - The user can specify a custom sound that iOS plays when it presents a local or remote notification for an app. The name of a sound file in the app bundle or in the
Library/Soundsfolder of the app’s data container. The sound in this file is played as an alert. If the sound file doesn’t exist ordefaultis specified as the value, the default alert sound is played.Category - Provide this key with a string value that represents the
identifierproperty of the category identifier that you created to define custom actions. When iOS sees a push notification with a category key, it looks up the categories that were registered by the app. If iOS finds a match, it displays the corresponding actions with the notification
Android Specific - GCM - The user should specify the UI information and actions for a notification. NOTE: If you plan to send push notifications to an Android device you must check the 'Android Specific - GCM' checkbox. Refer to official GCM documentation here.
Notification Message Title - The user should enter the push notification message in this text box. Cogswell will set the default value to match the 'Notification Message'.
Icon - The user should enter the custom icon name in this text box to set the custom icon. The custom icon should have previously defined. Cogswell will set a default value.
Click Action - The user should always define the action that's triggered when the user clicks the notification; usually this action opens an
Activityin your application. The user can also add buttons to the notification that perform additional actions, If the user uses additional action buttons, the user must also make their functionality available in anActivityin the app.
Click Next button to move to the Audience tab.
Step 3: AUDIENCE
Define which users, events or devices will receive a Campaign.
Show to
Whomever triggers this Campaign - Click box, default value. Selecting this option will show the Campaign to any user, event or device that meets the criteria defined in the Campaign Rules section.
Include Segments - Drop down list of all previously defined Segments for a specific Project - The user can select 1 or more Segments of users, events or devices that will be eligible to receive the Campaign.
- Exclude Segments - Drop down list of all previously defined Segments for a specific Project - The user can select 1 or more Segments of users, events or devices that will NOT be eligible to receive the Campaign.
Exclude Anyone who saw - Drop down list of all previously created Campaigns for a specific Project - The user can select 1 or more Campaigns that will NOT be eligible to receive this Campaign. If users, events or devices previously received or are eligible for defined Campaigns, they can be excluded from receiving this Campaign.
Message Frequency - Define how many time to show the campaign, drop down list.
Show only once - The Campaign will be shown only one time when the criteria defined in the Campaign Rules section is met.
Show anytime a qualifying trigger is detected - The Campaign will be shown as many times as the criteria defined in the Campaign Rules section is met.
Message Expiration - Define a timeframe that the Campaign message content remains current. If a Campaign message contains time sensitive content and will not be considered relevant, the user can choose to expire the message after a certain period of time.
Expire after - The user can select the number from the first field and select a time frame option from the drop down list. Values are Minutes, Hours, Days, Weeks. For example, 6 hours, 1 week, 10 minutes, etc.
Click Next button to move to the Rules tab.
Step 4: RULES
Define the Campaign triggering criteria by creating Rules, this functionality is similar to creating Segments to define a group of users, events or devices.
Rules- The user can create 1 or more Rules using Event Ranges, Event Filters, Attribute Filters and Attribute Conditions
No rules needed - By selecting this option the Campaign criteria will be based on the Audience that was defined for this Campaign in the previous tab.
Rule description - The user can define a name for a Rule based on the user's own schema. This field will accept alpha-numberic characters.
- Range - The user can create a range directive that will limit the Events to a particular range based on a count or time frame. A time frame Keep following a time frame Skip starts at the end of the Skip time period. A time frame Keep following an Event count Skip starts at the timestamp of the final Event skipped. Skip and Keep are both optional and the Starting From direction is required if there is a Skip or Keep.
- Starting From - Drop down list, values are Oldest or Newest
- Skip - A numeric field and drop down list to exclude Events
- Numeric Field - The number of Events or extent of time frame
- Drop Down List - Values are Events, Minutes, Hours, Days, Weeks
- Keep - A numeric field and drop down list to include Events, after any skipping of Events
- Numeric Field - The number of Events or extent of time frame
- Drop Down List - Values are Events, Minutes, Hours, Days, Weeks
- Note on millisecond accuracy: Time ranges include the millisecond of the event. For example, lets assume the direction is Newest, Skip is 1 hour, Keep is 1 hour, and the event that triggered this rule occurred at exactly 3:30am. In this case, an event at one millisecond after 2:30am will be skipped, and all events from 2:30am to one millisecond before 1:30am will be kept.
- Filters - The user can create as many Event and/or Attribute Filters as needed to apply to a Rule. The user does not have to create an Event Filter or Attribute Filter if they are not needed to create a triggering rule.
- Event Filter - Evaluate incoming data based on events. For example, Newest 5 Events, Oldest 100 Events etc.
- Reduction - Drop down list, values are Oldest or Newest
- Value - Numeric value
- Click '+Add Event Filter' button to create an Event Filter that is displayed in the Filter list. The user can create 1 or more Event Filters as needed.
- Attribute Filter - Evaluate incoming data based on an Attribute value. For example, 'Country' field 'is' value = United Sates, 'Opt-In' field 'is not' values = 'Undefined', 'Profile Updated' field 'is greater than' value = '2016-01-01', etc.
- Attribute - Drop down list consisting of previously defined Project Attributes
- Operator - This field will appear after an Attribute has been selected. This field is a drop down list with options based on the type of Attribute chosen.
- For Text attributes the available operators are - is / is not / starts with / does not start with / ends with / does not end with / contains / does not contain / has any value / has no value
- For Integer attributes the available operators are - is / is not / less than / greater than / has any value / has no value
- For Float attributes the available operators are - less than / greater than / has any value / has no value
- For Date attributes the available operators are - is / is not / after / before / has any value / has no value
- For Boolean attributes the available operators are - is true / is false / has any value / has no value
- Value - This field is a fill-in field where the appropriate value will be defined. This field is not available for a boolean attribute.
- Click '+Add Attribute Filter' button to create an Attribute Filter that is displayed in the Filter list. The user can create 1 or more Attribute Filters as needed.
- Event Filter - Evaluate incoming data based on events. For example, Newest 5 Events, Oldest 100 Events etc.
- Conditions - Evaluate incoming data based on an Attribute metric. For example, 'Newest' 'Opt-In' field 'is' value = Yes, 'Average' 'Daily Temperature' field 'is less than' values = '80 degrees', etc.
- Trigger if any events exist - If clicked, Conditions section disappears. By selecting this option the Campaign criteria will be based on the Audience that was defined for this Campaign in the previous tab and the Event and Attribute Filters. The campaign will be triggered if the filters do not filter out all the events.
- Attribute - Drop down list consisting of previously defined Project Attributes - The user must choose an Attribute in order to select a Reduction value.
- Reduction - Drop down list of options based on the type of Attribute chosen.
- For Text attributes the available reduction values are - oldest / newest / count
- For Integer attributes the available operators are - oldest / newest / count / average / sum
- For Float attributes the available operators are - oldest / newest / count / average / sum
- For Date attributes the available operators are - oldest / newest / count
- For Boolean attributes the available operators are - oldest / newest / count
- Reduction explanation:
- Count: This counts the number of events that contain a value for the specified attribute - exists in the result set from the filters. If your filters do not exclude the triggering event, then it is also counted (assuming that attribute exists in the triggering event). If all the events are filtered out then the count will be 0.
- Oldest: The oldest event in the result set from your filters.
- Newest: The most recent event in the filtered set of events.
- Average: For integers and floats only. This takes the average of all events that have the attribute value present. Events that are missing this attribute do not contribute to the average calculation. If all events are filtered out then the average is not defined, and all checks against it will fail.
- Sum: For integers and floats only. This sums all values of the events that have this attribute value present. If all the events are filtered out then the sum will be 0.
- Operator - This field is a drop down list with options based on the type of attribute chosen.
- For Text attributes the available operators are - is / is not / starts with / does not start with / ends with / does not end with / contains / does not contain / has any value / has no value
- For Integer attributes the available operators are - is / is not / less than / greater than / has any value / has no value
- For Float attributes the available operators are - less than / greater than / has any value / has no value
- For Date attributes the available operators are - is / is not / is after / is before / is in (last / next / today) / is not in (last / next / today) / has any value / has no value
- For Boolean attributes the available operators are - is true / is false / has any value / has no value
- Value - This field is a fill-in field where the appropriate value will be defined. This field is not available for a boolean attribute.
- Click '+Add Condition' button to create a Condition Filter that is displayed in the Conditions list. The user can create 1 or more Conditions as needed.
- Range - The user can create a range directive that will limit the Events to a particular range based on a count or time frame. A time frame Keep following a time frame Skip starts at the end of the Skip time period. A time frame Keep following an Event count Skip starts at the timestamp of the final Event skipped. Skip and Keep are both optional and the Starting From direction is required if there is a Skip or Keep.
- Once the user has created as many Event, Attribute Filters and/or Conditions, the user then clicks the '+Add Rule' button to create a triggering Rule for the Campaign. The user can create as many Rules as necessary. All Rules will will de displayed in the Rules list.
- When the user is satisfied that all triggering Rules have been created, the user clicks the 'Finish' button to save all options and create the Campaign.
Project Attributes
The Project Attributes page displays a list of Core Attributes, if the user previously defined Core Attributes, and Project Attributes that the user has created to use with a Project. New Project Attributes can be created on the page as well.
The Attribute Name, Data Type and Primary Key are displayed on the Project Attribute page. The available ‘Action’ for each Attribute is ‘delete’, Attributes can only be deleted if data has not been previously collected.
Project Attributes - Fields that are specific to a Project. Project Attributes can be deleted only if data has not been previously collected. Project Attributes are not required.
To create a Project Attribute the user needs to name the attribute according the user's schema and select the appropriate Data Type. After clicking the “Add attribute’ button, the new Attribute will be displayed in the list of Attributes. Attributes are listed in alpha order.
- Attribute Names – Can consist of alphanumeric characters and underscores (_), this field does not accept spaces
- Data Types – Integer, Text, Float, Date, Boolean
Primary Key - For each Project a Primary Key needs to be defined to uniquely identify a record. This could correspond to a unique identification number of a customer, a device, or a combination of both. Primary Keys(s) can be a single Attribute or a combination of Attributes. The Primary Key(s) will describe how your data is organized so careful consideration should be given when defining a Primary Key or Keys. The Primary Key Attribute(s) can be Project specific, or come from the list of Core Attributes. Once created, the Primary Key for a Project cannot be changed.
Project Segments
The Project Segments page displays a list of Segments if the user has previously defined Segments. New Segments can be created on this page as well.
The Segment Name, Created Date, Count and Actions are displayed on the Project Segments page. Actions for Segments are 'Delete' and 'Edit'.
Project Segments - A Segment is a population of users or events that the user can target in a campaign. A Segment is a dynamic and reusable set of filters and conditions to group users, events or devices. Data that meets the criteria for a defined Segment will be added to the Segment when the data is sent in after the segment is created, and sent or shown any active campaign that includes the Segment and for which the Campaign Rules are met.
To create a Project Segment the user names the Segment according the user's schema. Users can then define Event Filters, Attribute Filters or Conditions to create a Segment Rule depending on the type of Segment the user wishes to create.
One Segment Rule can consist of multiple Event and/or Attribute Filters and/or Conditions. Once the Segment Rule is created the user clicks the '+Add Rule' button which adds the new Segment Rule to the Rules list. The user can then add additional Rules in the same manner depending on the type of data segmentation required. Once all of the Segment Rules have been created the user clicks the 'Add Segment' button to create the Segment and add the Segment to the Project Segments list. Segments are listed in alpha order.
Targeting data by creating Segments is very flexible. Depending on how specific the users event data segmentation requirements are, a Segment can be created with just one Segment Rule containing one Filter or Condition, or one Segment Rule with several Filters and Conditions, or several Segment Rules. The user can also use multiple Segments when defining the Audience of a specific Campaign.
If the users has defined more that one Segment Rule for a Segment, the Rules will be evaluated with an 'AND' statement. The event data must satisfy all Rules in order to qualify for the Segment. For example, if Rule 1: Country = US, Rule 2: State = CA, then the event data that matches Country = US AND State=CA would be added the Segment.
If the user has defined more than one Segment to target an Audience in a Campaign the Segments will evaluated with an 'OR' statement. The event data must satisfy one of the Rules in order to qualify for the Campaign. For example, if Segment 1: Country = US and State = CA, Segment 2: Country = US and State = NM, then the event data that matches Country = US and State=CA OR Country = US and State=NM would would qualify to receive the Campaign. The Campaign would be sent to an Audience from CA OR NM.
Segment rules can have several parts:
- Range – Initial filter to skip and keep events in a range
- Event Filters – Target a specific set of events
- Attribute Filters – Target 1 or more Attributes, with a specific value or range
- Conditions - Apply a metric to an Attribute value that must return a value of true
Each of these parts can be customized:
- Range - The user can create a range directive that will limit the Events to a particular range based on a count or time frame. A time frame Keep following a time frame Skip starts at the end of the Skip time period. A time frame Keep following an Event count Skip starts at the timestamp of the final Event skipped. Skip and Keep are both optional and the Starting From direction is required if there is a Skip or Keep.
- Starting From - Drop down list, values are Oldest or Newest
- Skip - A numeric field and drop down list to exclude Events
- Numeric Field - The number of Events or extent of time frame
- Drop Down List - Values are Events, Minutes, Hours, Days, Weeks
- Keep - A numeric field and drop down list to include Events, after any skipping of Events
- Numeric Field - The number of Events or extent of time frame
- Drop Down List - Values are Events, Minutes, Hours, Days, Weeks
- Note on millisecond accuracy: Time ranges include the millisecond of the event. For example, lets assume the direction is Newest, Skip is 1 hour, Keep is 1 hour, and the event that triggered this rule occurred at exactly 3:30am. In this case, an event at one millisecond after 2:30am will be skipped, and all events from 2:30am to one millisecond before 1:30am will be kept.
- Filters - The user can create as many Event and/or Attribute Filters as needed to apply to a Rule. The user does not have to create an Event Filter or Attribute Filter if they are no needed to create a triggering Segment.
- Event Filter - Evaluate incoming data based on events or time frame. For example, Newest 5 Events, Newest 2 Weeks, Newest 5 Minutes, etc. If the user chooses the 'Oldest' reduction value the Unit option is limited to 'Events'. This is to create a reliable static point in time for which to evaluate rules efficiently.
- Reduction - Drop down list, values are Oldest or Newest
- Value - Numeric value
- Unit - Drop down list, Values are Events, Minutes, Hours, Days, Weeks
- Click '+Add Event Filter' button to create an Event Filter that is displayed in the Filter list. The user can create 1 or more Event Filters as needed.
- Attribute Filter - Evaluate incoming data based on an Attribute value. For example, 'Country' field 'is' value = United Sates, 'Opt-In' field 'is not' values = 'Undefined', 'Profile Updated' field 'is greater than' value = '2016-01-01', etc.
- Attribute - Drop down list consisting of previously defined Project Attributes
- Operator - This field will appear after an Attribute has been selected. This field is a drop down list with options based on the type of attribute chosen.
- For Text Attributes the available operators are - is / is not / starts with / does not start with / ends with / does not end with / contains / does not contain / has any value / has no value
- For Integer Attributes the available operators are - is / is not / less than / greater than / has any value / has no value
- For Float Attributes the available operators are - less than / greater than / has any value / has no value
- For Date Attributes the available operators are - is / is not / is before / is after / has any value / has no value
- For Boolean Attributes the available operators are - is true / is false / has any value / has no value
- Value - This field is a fill-in field where the appropriate value will be defined. This field is not available for a boolean attribute.
- Click '+Add Attribute Filter' button to create an Attribute Filter that is displayed in the Filter list. The user can create 1 or more Attribute Filters as needed.
- Event Filter - Evaluate incoming data based on events or time frame. For example, Newest 5 Events, Newest 2 Weeks, Newest 5 Minutes, etc. If the user chooses the 'Oldest' reduction value the Unit option is limited to 'Events'. This is to create a reliable static point in time for which to evaluate rules efficiently.
- Conditions - Evaluate incoming data based on an Attribute metric. For example, 'Newest' 'Opt-In' field 'is' value = Yes, 'Average' 'Daily Temperature' field 'is less than' values = '80 degrees', etc.
- Trigger if any events exist - If clicked the Conditions section disappears. By selecting this option the campaign criteria will be based on the Audience that was defined for this campaign in the previous tab and the Event and Attribute Filters.
- Attribute - Drop down list consisting of previously defined Project Attributes - The user must choose an Attribute in order to select a Reduction value.
- Reduction - Drop down list of options based on the type of Attribute chosen.
- For Text Attributes the available reduction values are - oldest / newest / count
- For Integer Attributes the available operators are - oldest / newest / count / average / sum
- For Float Attributes the available operators are - oldest / newest / count / average / sum
- For Date Attributes the available operators are - oldest / newest / count
- For Boolean Attributes the available operators are - oldest / newest / count
- Reduction explanation:
- Count: This takes the number of times the specific attribute selected has been in an event for the filtered set of events. This includes the triggering event.
- Oldest: The first event in the filtered set of events
- Newest: The most recent event in the filtered set of events. This may not be the triggering event if an event had been sent in before the triggering event has been processed.
- Average: For integers and floats only. This takes the average of all events that have the attribute value present. Events that are missing this attribute do not contribute to the average calculation
- Sum: For integers and floats only. This sums all values of the events that have this attribute value present.
- Operator - This field is a drop down list with options based on the type of Attribute chosen.
- For Text attributes the available operators are - is / is not / starts with / does not start with / ends with / does not end with / contains / does not contain / has any value / has no value
- For Integer attributes the available operators are - is / is not / less than / greater than / has any value / has no value
- For Float attributes the available operators are - less than / greater than / has any value / has no value
- For Date attributes the available operators are - is / is not / is after / is before / is in (last / next / today) / is not in (last / next / today) / has any value / has no value
- For Boolean attributes the available operators are - is true / is false / has any value / has no value
- Value - This field is a fill-in field where the appropriate value will be defined. This field is not available for a boolean attribute.
Export
- Event Data - Incoming events
- All historical - Selecting this radio button will export all of the event data associated with a particular Project. The approximate record count will display the total record count.
- Date Range - The user can select a specific start date and end date. The approximate record count will update and display the total record count.
- Authorization Checkbox - Users must authorize billing charges for exported data.
- Data is exported and downloaded as a .csv file.
Export Data Header - Includes all Project Attributes that have been created.
Timestamp Nanosecond Event ID Event Name Project ID CIID Offset Tags Project Attribute Project Attribute Project Attribute etc.
- Sent Messages Data - Campaign messages sent
- All historical - Selecting this radio button will export all of the sent messages data associated with a particular Project. The approximate record count will display the total record count.
- Date Range - The user can select a specific start date and end date. The approximate record count will update and display the total record count.
- Authorization Checkbox - Users must authorize billing charges for exported data.
- Data is exported and downloaded as a .csv file.
Export Data Header
CIID Campaign ID Message ID Creation Date Last Attempt APNS Count GCM Count Websocket Acknowledgement Count Websocket Send Count Read Count Status Message
Account
Usage
This page maintains the event data and associated billing charges that occurred for an account during a month. Historical usage and billing data is available and can be accessed by clicking on the drop down list in the upper right corner.
- Events Received - A total of all incoming events processed for all Projects associated with a user account.
- Messages Sent - A total of all Campaign Messages sent for all Projects associated with a user account.
- Records Exported - A total of all records exported for all Projects associated with a user account.
Payments
This page maintains payment methods used for a user account. The user can add, delete or edit credit or debit card information, and set the default payment method.
Account Settings
This page is available to update account information
- Profile Information - Add or update profile information
- Change Email - Update email address and login
- Change Password